

Follow the steps below to configure Single Sign-On (SSO) using Microsoft Entra ID (Azure AD) for your AiStrike account.◼︎
Step 1: Create an SSO Group in AiStrike
-
Log in to your AiStrike App.
-
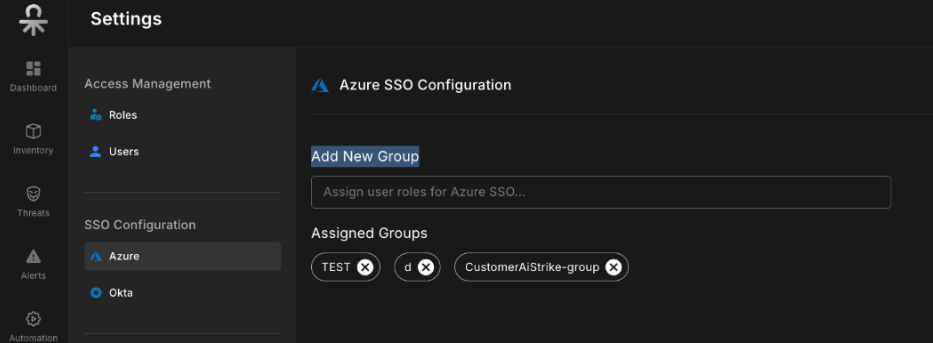
Navigate to Settings → SSO Configuration.
-
Add Group Name by typing inside "Add New Group"
-
Example:
CustomerAiStrike-group
-
-
Press enter to save the group name.
Step 2: Create a Matching Group in Microsoft Entra ID
-
Log in to your Azure Portal → Microsoft Entra ID.
-
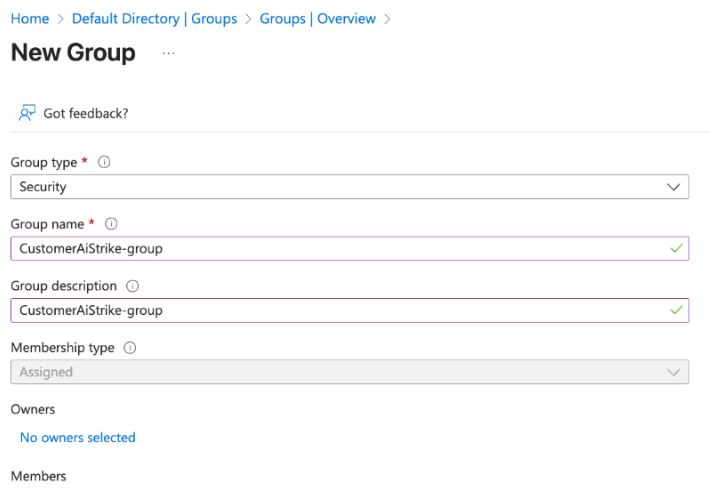
Go to Groups → New Group.
-
Configure as follows:
-
Group Type: Security
-
Group Name: Same as your AiStrike SSO group name (e.g.,
CustomerAiStrike-group)
-
NOTE: Ensure the group name matches exactly, including case sensitivity, spacing, spelling, and formatting, as any mismatch may cause SSO group mapping to fail.
-
Group Description: Add a relevant description (e.g., AiStrike SSO Access Group)
-
Membership Type: Assigned
-
Under Members, click + Add Members → search for and select the users who should have access to AiStrike.
-
Click Select, then Create to save the group.
Step 3: Test Azure SSO Login
-
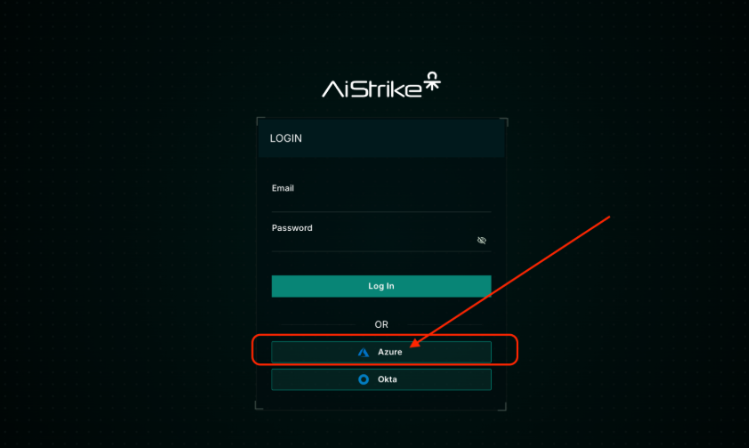
Open your AiStrike login page — e.g., https://customer.aistrike.com.
-
Click on the Azure button under "Log in button".
-
You will be redirected to your organization's Azure login page.
-
Enter your Azure credentials.
-
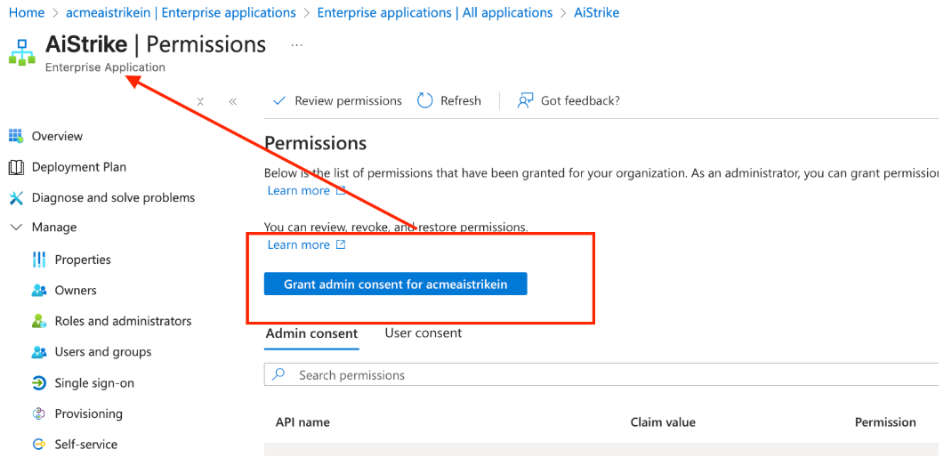
You should see the AiStrike app now in Azure Directory > Enterprise Application under your tenant, with (Login with Global Administrator permissions).
-
Grant Admin consent for the AiStrike app in your directory.
-
Once Admin consent is successful, re-login with Azure user credentials.
-
Upon successful authentication, you'll be logged into AiStrike via SSO.
NOTE: In case you face any issue like unauthentication, make sure Admin consent is successful for AiStrike all and clear cookies for AiStrike app and try again.