

Overview
This document guides you through configuring OpenID Connect (OIDC)-based Single Sign-On (SSO) between Okta and AiStrike, enabling seamless, secure authentication and automatic role provisioning via Okta groups.◼︎
1. Prerequisites
To begin, ensure the following:
-
You have admin access to both Okta and your AiStrike tenant.
-
You've created or identified Okta groups to map to AiStrike roles:
-
read-only
-
admin
-
super-admin
-
2. Application Registration in Okta
Step 1: Create a New OIDC Application
-
Sign in to your Okta Admin Console.
-
Navigate to Applications → Applications.
-
Click Create App Integration.
-
Select the following:
-
Sign-in method: OIDC - OpenID Connect
-
Application type: Web Application
-
-
Click Next.
Step 2: Configure Application Settings
Fill in the following values:
-
App name: AiStrike SSO
-
Sign-in redirect URIs (Callback URI):
-
https://<customer>.aistrike.com/api/auth/callback/okta
-
-
Sign-out redirect URI:
-
https://<customer>.aistrike.com
-
-
In Controlled access, choose Skip group assignment for now — you can assign users separately.
Step 3: Gather Required Details
After saving, go to the application General tab and collect the following:
-
Client ID: (Displayed on the application page)
-
Client Secret: (Displayed on the application page)
-
Issuer URI:
-
https://<your-okta-domain>/oauth2/default -
Replace
<your-okta-domain>with your actual Okta subdomain (e.g.,dev-123456.okta.com).
-
📷 [Screenshot slot: General tab — Client ID / Client Secret]
3. Configure Group Claims in Okta
To pass group membership to AiStrike for role assignment:
-
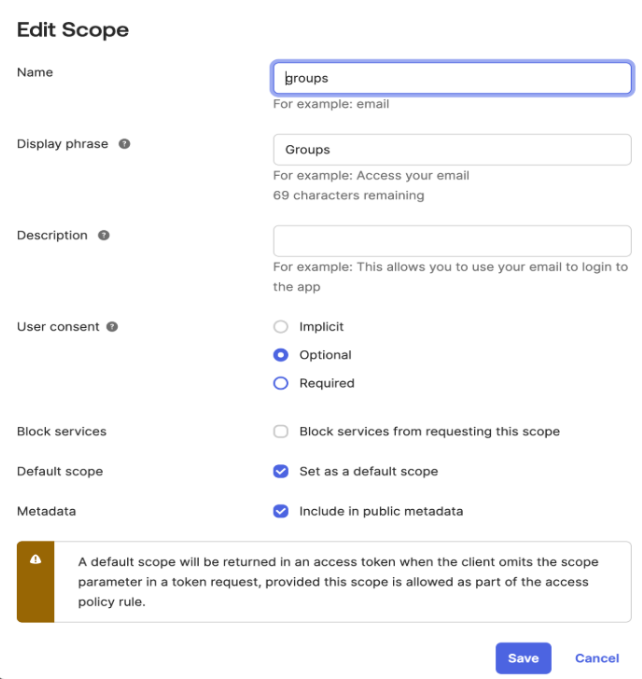
Add a claim with name
groups -
Add a scope with name
groups
To add the claim, follow the steps below:
-
Go to Security → API → Authorization Servers.
-
Select your default authorization server.
-
Click the Claims tab.
-
Click Add Claim:
-
Name:
groups -
Include in token type: ID Token
-
Value type: Groups
-
Filter: Matches regex with value
.* -
Include in: Any scope
-
Click Create.
-
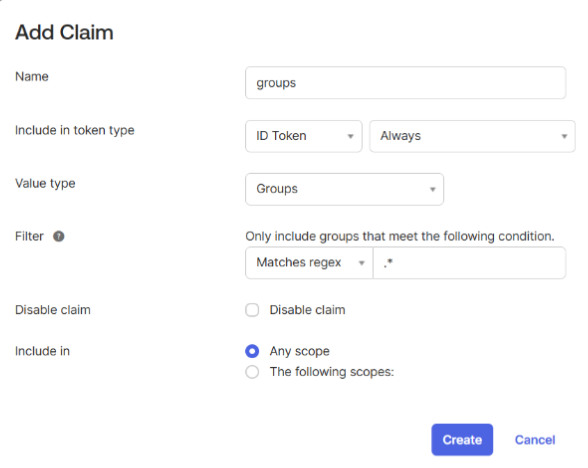
To add the scope, follow the steps below:
-
Go to Security → API → Authorization Servers.
-
Select your default authorization server.
-
Click the Scopes tab.
-
Click Add Scope:
-
Name:
groups -
User Consent: Required
-
Please make sure that "Block services" is not selected.
-
This ensures Okta includes user group information in the OIDC token sent to AiStrike.
4. Add Authorization Policy and Rule
-
Go to Security → API → Authorization Servers.
-
Select your default authorization server.
-
Go to Access Policies.
-
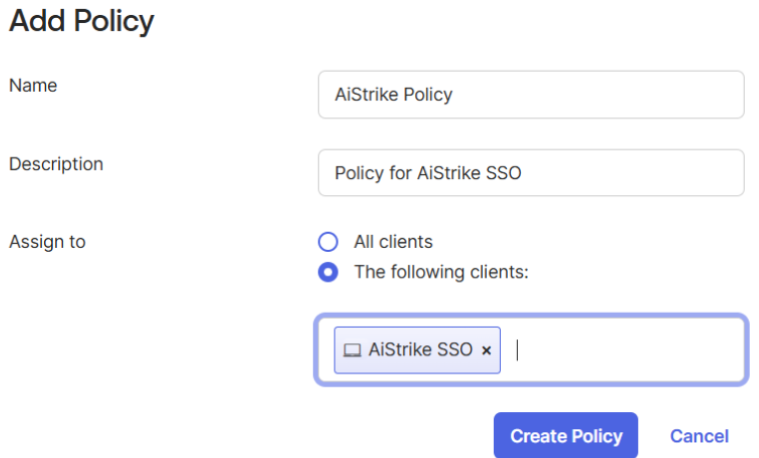
Click Create new:
-
Enter policy name and description.
-
Add the AiStrike SSO app that you created in Step 1 to the client.
-
In the same policy, add a rule with a name and a default option.
-
5. Provide Configuration Details in AiStrike
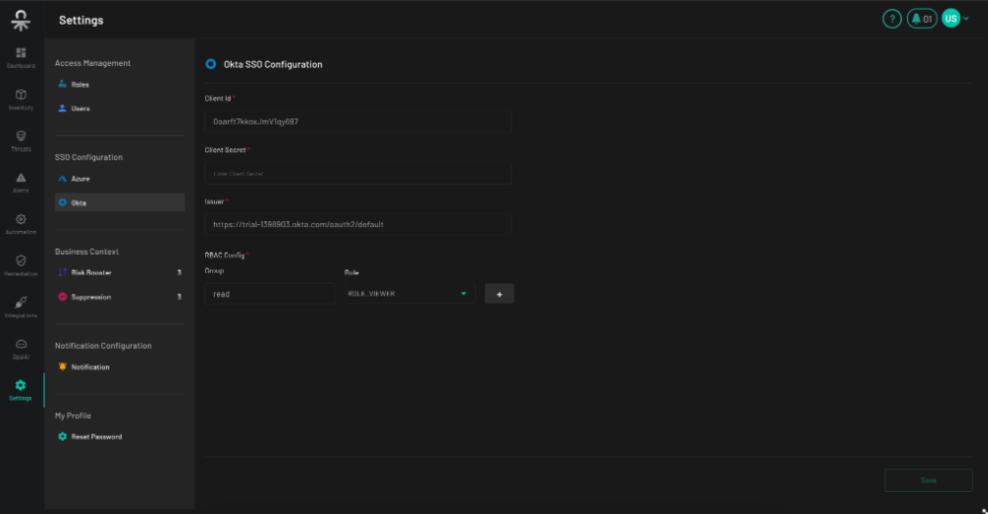
Configure the Okta SSO in the AiStrike settings page under SSO Configurations by providing the details below:
-
Client ID
-
Issuer URI
-
Client Secret
-
Role Mappings
6. Okta Group to AiStrike Role Mapping
AiStrike uses the groups claim in the OIDC ID token to assign user roles based on group membership:
|
Okta Group |
AiStrike Role |
Permissions |
|---|---|---|
|
read-only |
Viewer |
Read-only access |
|
admin |
Admin |
Full access (team-level) |
|
super-admin |
Super Admin |
Full access (tenant-wide) |
Note: If a user is part of multiple groups, AiStrike applies the highest-privilege role.
7. Assign Users and Test
-
In Okta, open your AiStrike OIDC App.
-
Under the Assignments tab, assign users or user groups.
-
Ensure users are members of the correct Okta groups (read-only, admin, super-admin).
📷 [Screenshot slot: Assignments tab]
To test:
-
Have the user visit:
https://<customer>.aistrike.com -
They should be redirected to Okta for authentication when clicking Login with Okta.
-
On successful login, they will be provisioned into AiStrike with the appropriate role.
Notes
-
Just-in-Time (JIT) Provisioning: AiStrike supports JIT provisioning. Users are created on the first successful login.
-
Changes to Groups: Role changes require updating group membership in Okta and re-authentication.