

This document provides step-by-step instructions for integrating Jira with AiStrike, enabling automated and manual alert notifications, as well as direct incident response actions within Jira.◼︎
1. Prerequisites
Ensure you have permission to do the following:
-
Jira user creation and assigning admin credentials to create issue access.
-
Add a Jira API key.
-
Obtain the Jira email address used for the integration (e.g.,
aistrike_integration@domain.com). -
Obtain the Jira domain name (e.g.,
mycompany.atlassian.net). -
Obtain the Jira project key (required for the integration).
How to Generate a Jira API Key
To obtain an API key for integration with AiStrike, please follow the steps below:
-
Log in to your Jira account (for example:
https://mycompany.atlassian.net) using the designated API user account for AiStrike. -
Click on your user profile icon in the top-right corner and select "Manage Account."
-
In the top navigation bar, go to the "Security" section.
-
Under the API tokens section, click "Create and manage API tokens."
-
Click the "Create API token" button.

-
Enter a recognizable name for the API key — for example,
AiStrike_Integration_Account— and click "Create." -
Copy the API token displayed and store it securely. This token will be used later to configure the integration. Note: the token is only shown once and cannot be retrieved again.
-
Get the Jira project key. This is required for the integration page.
2. Integration Steps
-
Log in to the AiStrike Console.
-
Navigate to AiStrike > Integrations and select Jira.
-
Click the Jira icon to open the Jira connector page.
-
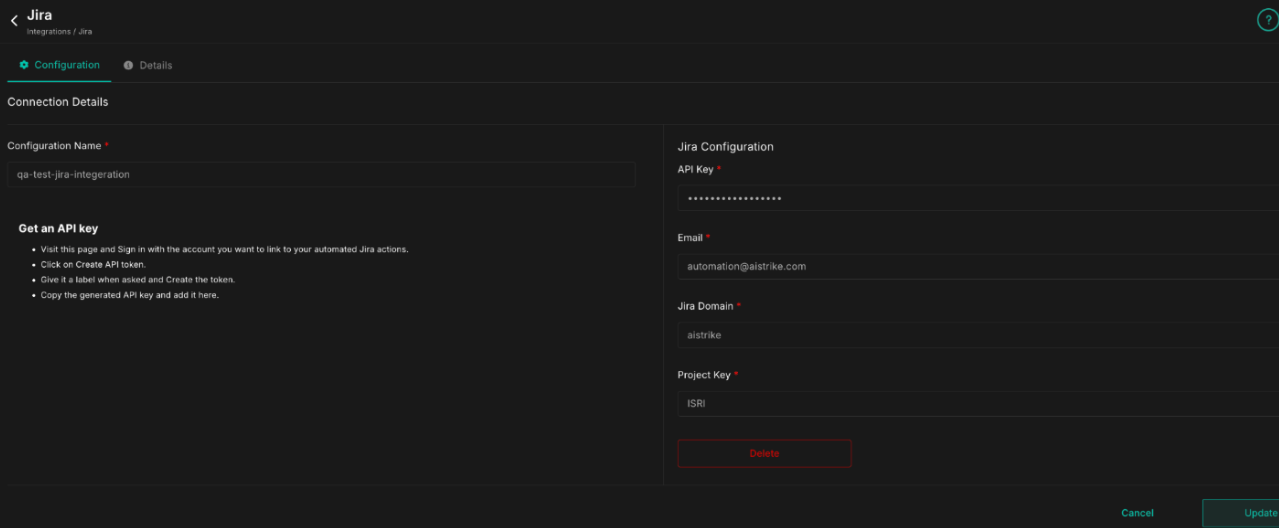
Enter the following details in the connector form:
-
Configuration Name — A label for this integration (e.g.,
AiStrike_Jira_Prod). -
API Key — The API token generated in Section 1.
-
Email — The Jira account email address used to generate the API key.
-
Jira Domain — Your Atlassian domain without "https://" (e.g.,
mycompany.atlassian.net). -
Project Key (JIRA) — Add the Project Key for Jira where Jira tickets need to be created.
-
-
Click Connect.
3. Testing Jira Connectivity and Notifications
-
Navigate to any Alert or Composite Alert in the AiStrike app.
-
Click the alert name to view the alert details page.
-
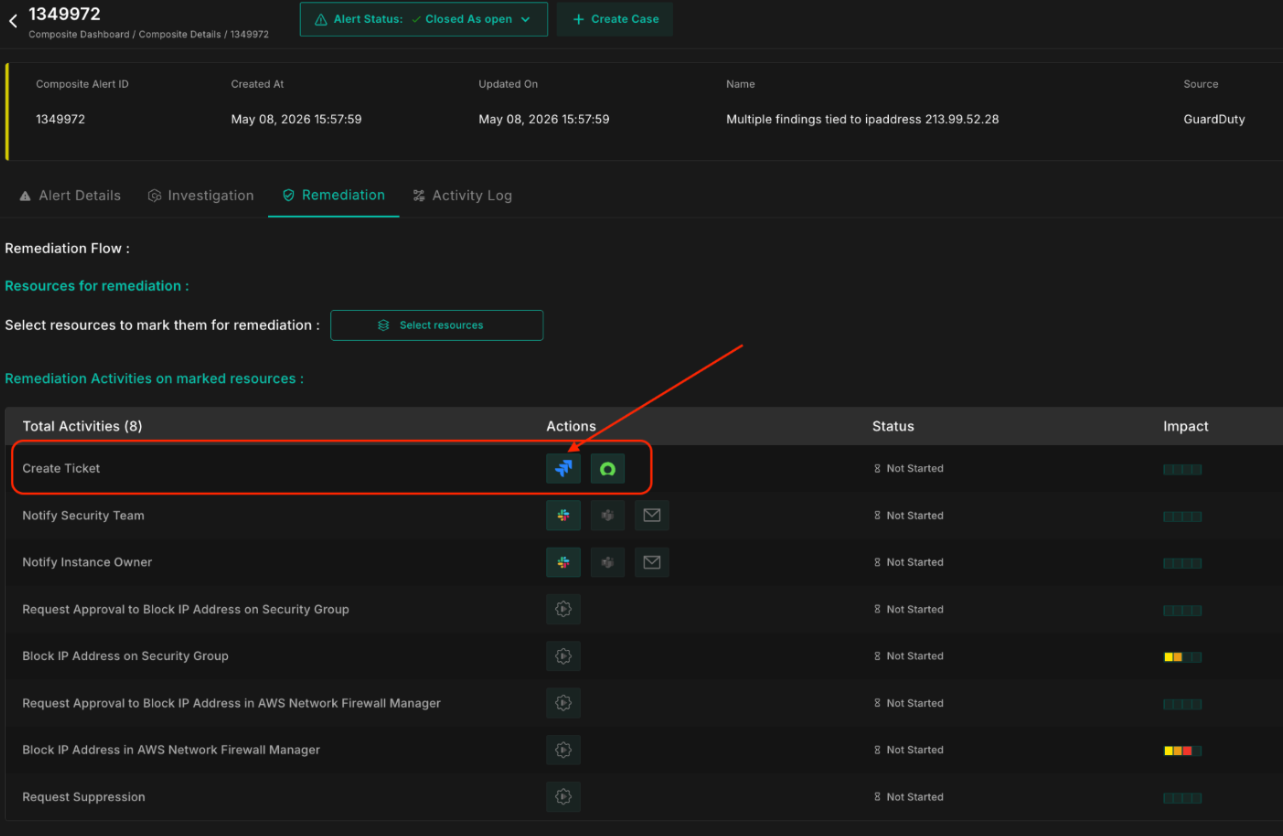
Go to the Remediations tab.
-
Under available remediation actions, under "Create Ticket", click the Jira Icon.
-
Verify that a ticket has been successfully created in Jira based on the configured integration.
Troubleshooting
If a ticket is not created after completing the steps above, check the following:
-
Verify the API key is correct and has not expired.
-
Confirm the Jira email address matches the account used to generate the API key.
-
Check that the Jira domain is entered without "https://" (e.g.,
mycompany.atlassian.net). -
Ensure the Jira user has permission to create issues in the target project.
-
If the issue persists, contact AiStrike support with your configuration details.