

This guide covers onboarding AWS accounts or an entire AWS Organization into AiStrike using Terraform, collecting from AWS security services such as GuardDuty, Inspector, and Security Hub.◼︎
Prerequisites
-
User executing the script should have admin access to the AWS Organization management account [Access Key and Secret for IAM User].
-
Terraform installed on your local machine — Install Terraform.
-
AWS CLI installed and configured — Install AWS CLI.
Setup
1. Install and Configure Terraform
To use Terraform, you need to install it on your local machine. Follow these steps to Install Terraform:
-
Download Terraform from the official website.
-
Install Terraform according to your operating system.
-
Verify the installation by running:
terraform --version
-
Configure your AWS credentials by running aws configure.
2. Manage AWS accounts
-
Generate AWS Access Key ID and Secret Access Key.
-
Create an AWS profile on your local machine via Terminal/PowerShell.
-
Set up AWS Profile:
aws configure --profile <profile-name>
This command prompts you to enter configuration details for a specific profile, including:
-
AWS Access Key ID
-
AWS Secret Access Key
-
Default Region Name (e.g. us-east-1)
-
Default Output Format (e.g. json)
Example: aws configure --profile 123456789012 / [ORG Management AWS Account ID]
AWS Access Key ID [None]: AKIAXXXXXXXXXXXXXXXX
AWS Secret Access Key [None]: wJalrXUtnFEMI/K7MDENG/bPxRfiCYXXXXXXXX
Default region name [None]: us-east-1
Default output format [None]: json
-
Validate the profile is set up:
-
Set a profile for the current terminal session.
-
Validate the profile is set up correctly with the correct account:
-
aws sts get-caller-identity
This should produce an output according to the profile credentials. Example:
{
    "UserId": "AIDAEXAMPLEID",
    "Account": "123456789012",
    "Arn": "arn:aws:iam::123456789012:user/YourUserName"
}
NOTE: If you have multiple AWS Profiles set up locally, use the command below to set the correct profile:
-
export AWS_PROFILE=123456789012[MacOS] -
set AWS_PROFILE=123456789012[Windows]
3. Define Your Infrastructure
Now that your environment is set up, it's time to define the infrastructure for connector configuration.
-
Authenticate into the AiStrike application. [Email and password shared by AiStrike]
-
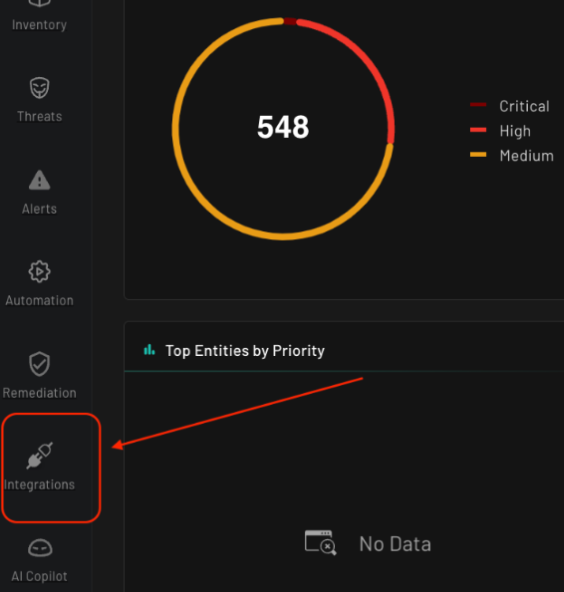
Navigate to Dashboard > Integrations from the left side panel.
-
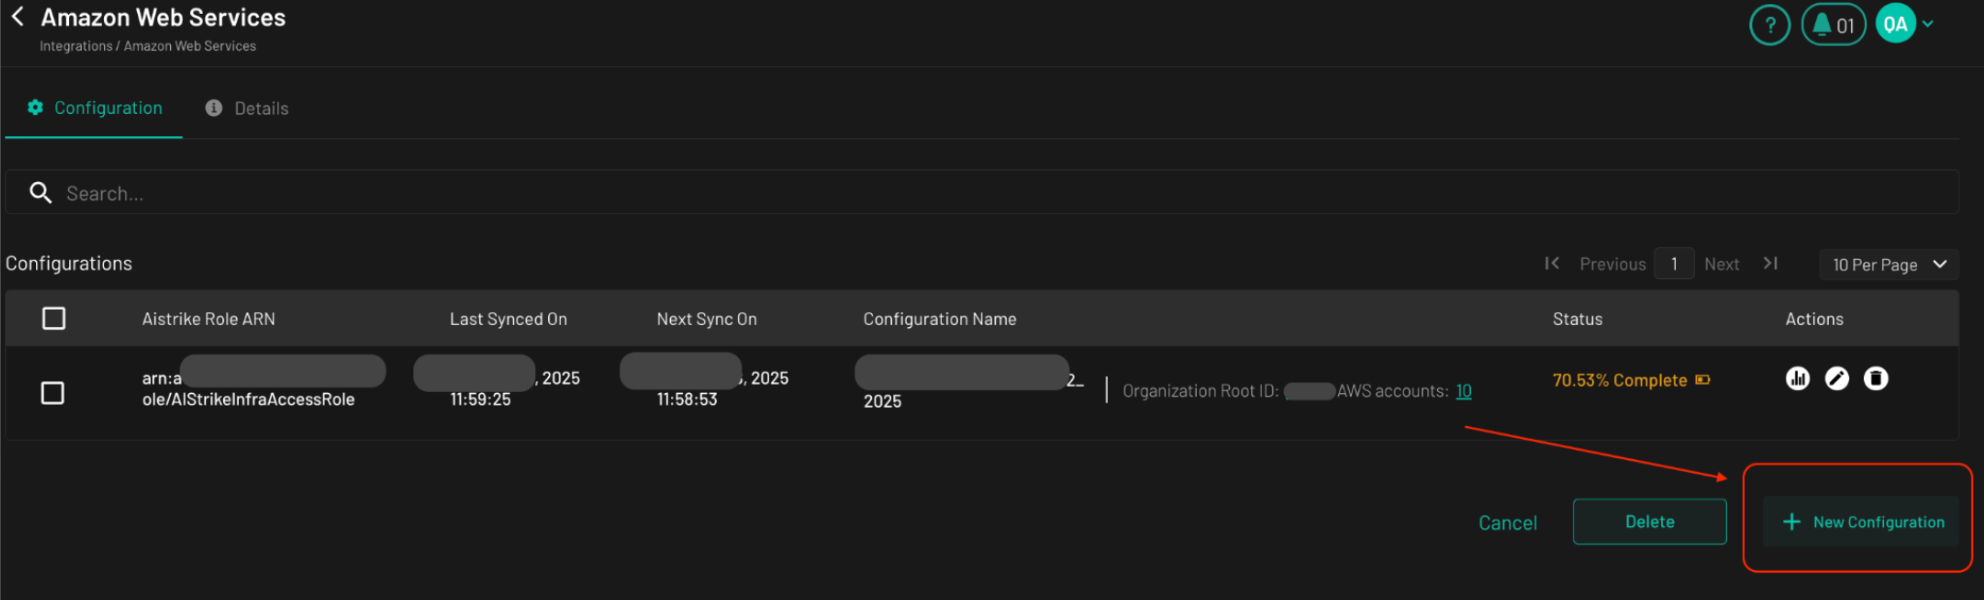
Click AWS Web Services connector & select new configuration.
-
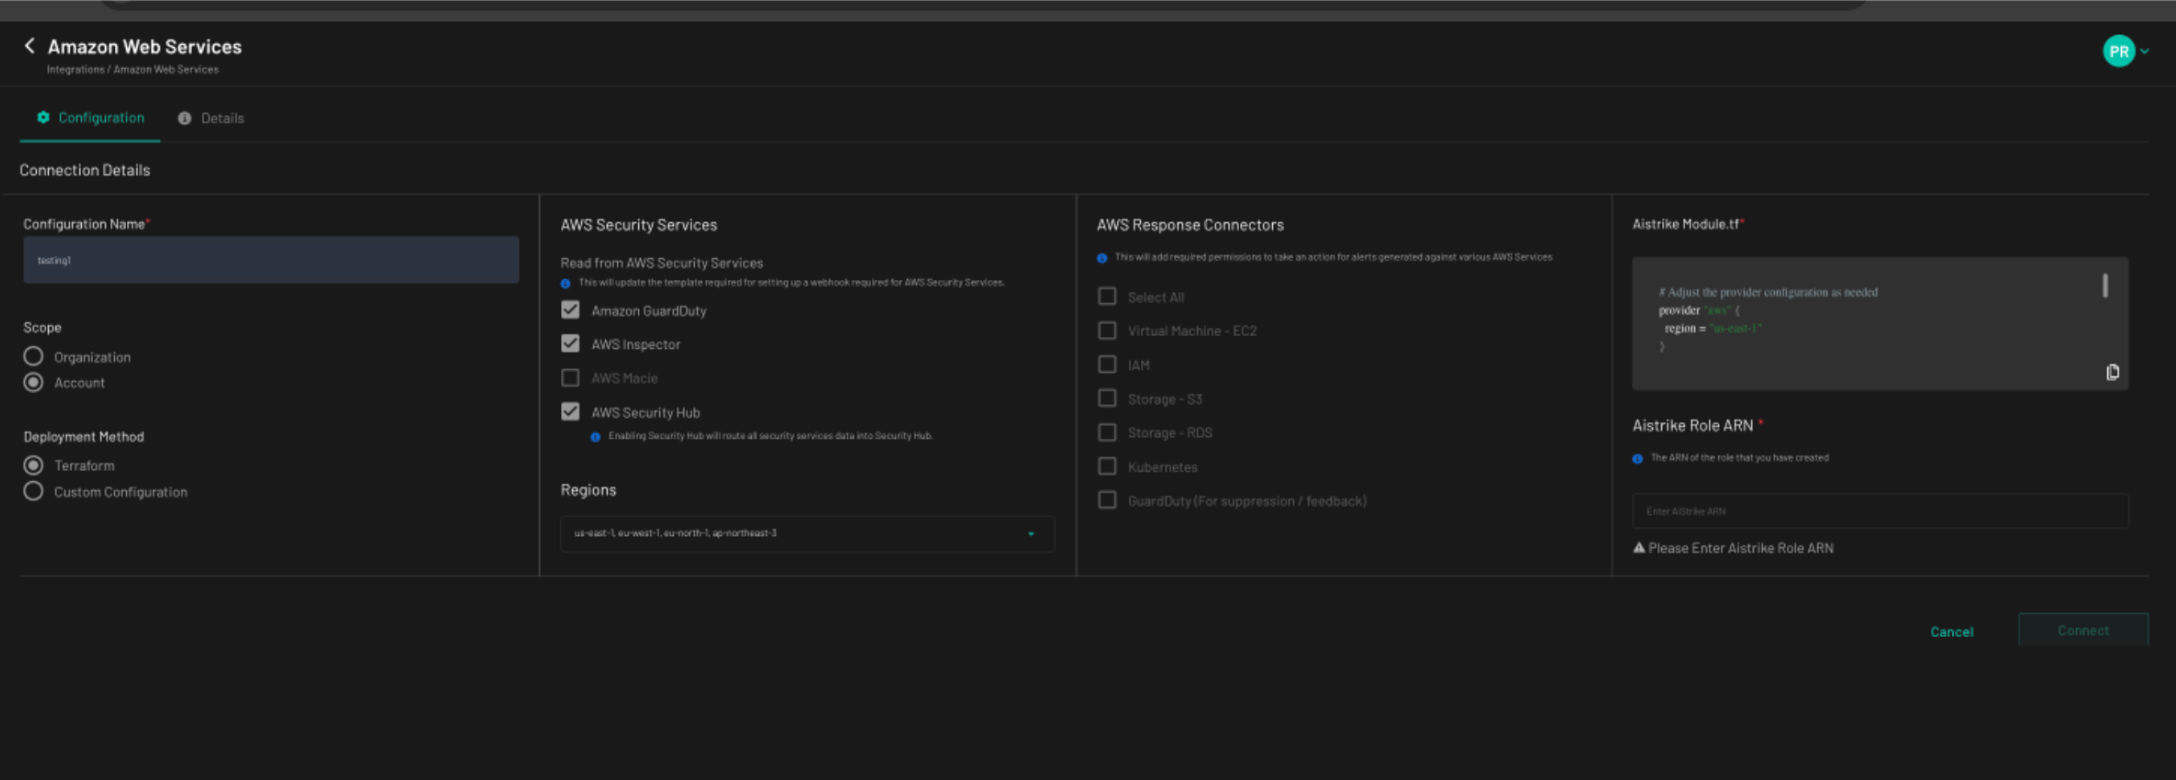
Add required details (Configuration Name, Scope, Deployment Method) & select AWS Security Services (GuardDuty, Inspector & Inspector).
-
Choose the regions that are enabled in your account/organisation.
-
You have two options for onboarding:
-
Organisation
-
Account
-
Organisation Onboarding:
-
Choose between two options:
-
All: Onboard All accounts.
-
Include: Onboard a specific set of accounts, by providing a .txt file with the list of AWS Account IDs [List each AWS account ID on a new line in the
.txtfile.]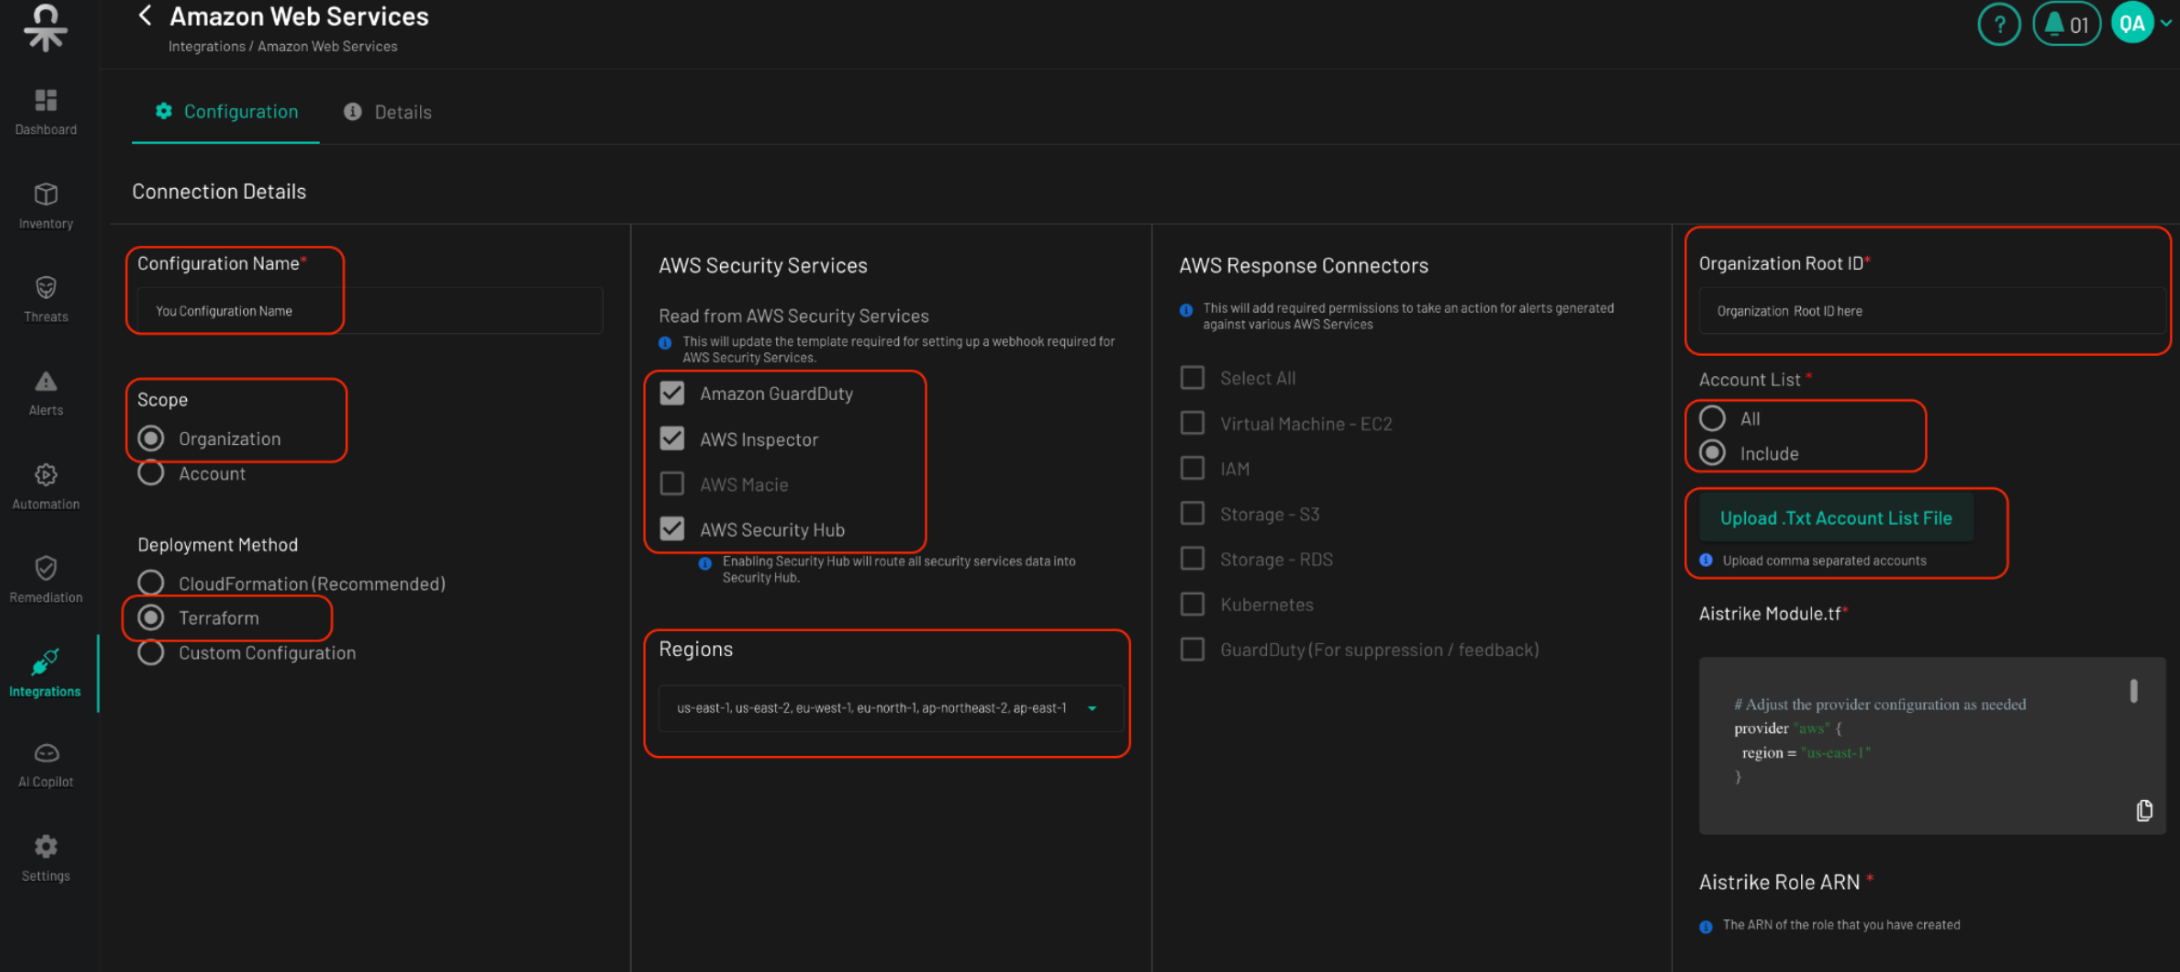
-
-
Copy the script from the section "AiStrike Module.tf" in the UI & save in a new file with a
.tfextension.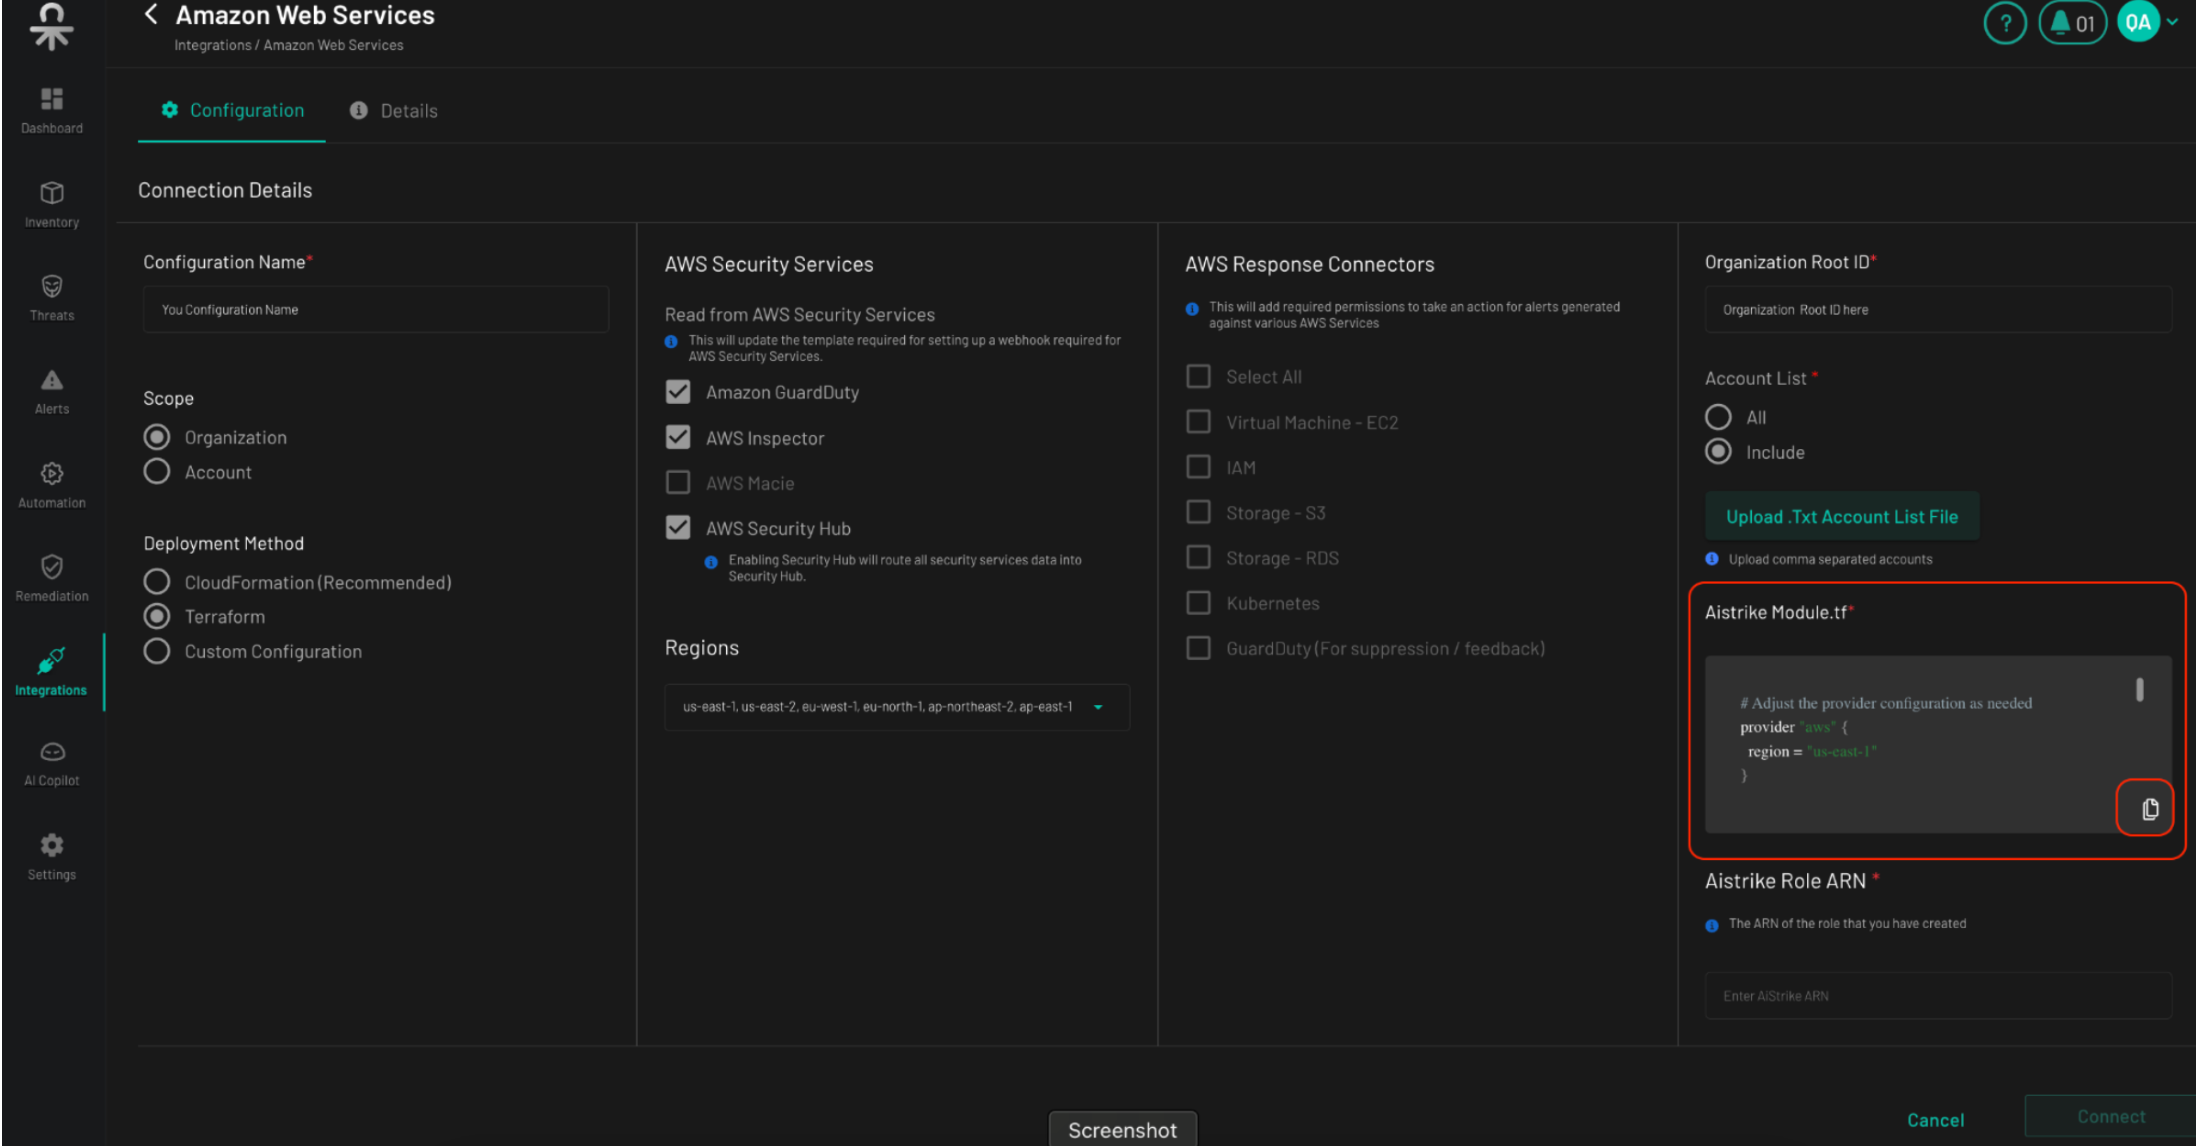
Single Account Onboarding:
-
For a single account, choose the "Account" option for scope.
-
Terraform for Deployment method.
-
Choose Security service [GuardDuty, Inspector, Security Hub etc.].
-
Select the region where you have the service enabled or will be enabled in future.
-
Copy the Terraform script and execute.
4. Initialise and Apply
-
Save the Terraform file [.tf] in a new folder/directory. Navigate to your Terraform project folder in your command prompt and run:
terraform init
terraform apply
-
Type 'yes' when prompted.
This will initialize Terraform and create the required AWS resources & AiStrike Role ARN as an output.
NOTE: For any issues during Terraform execution, please refer to the troubleshooting section at the end of this document.
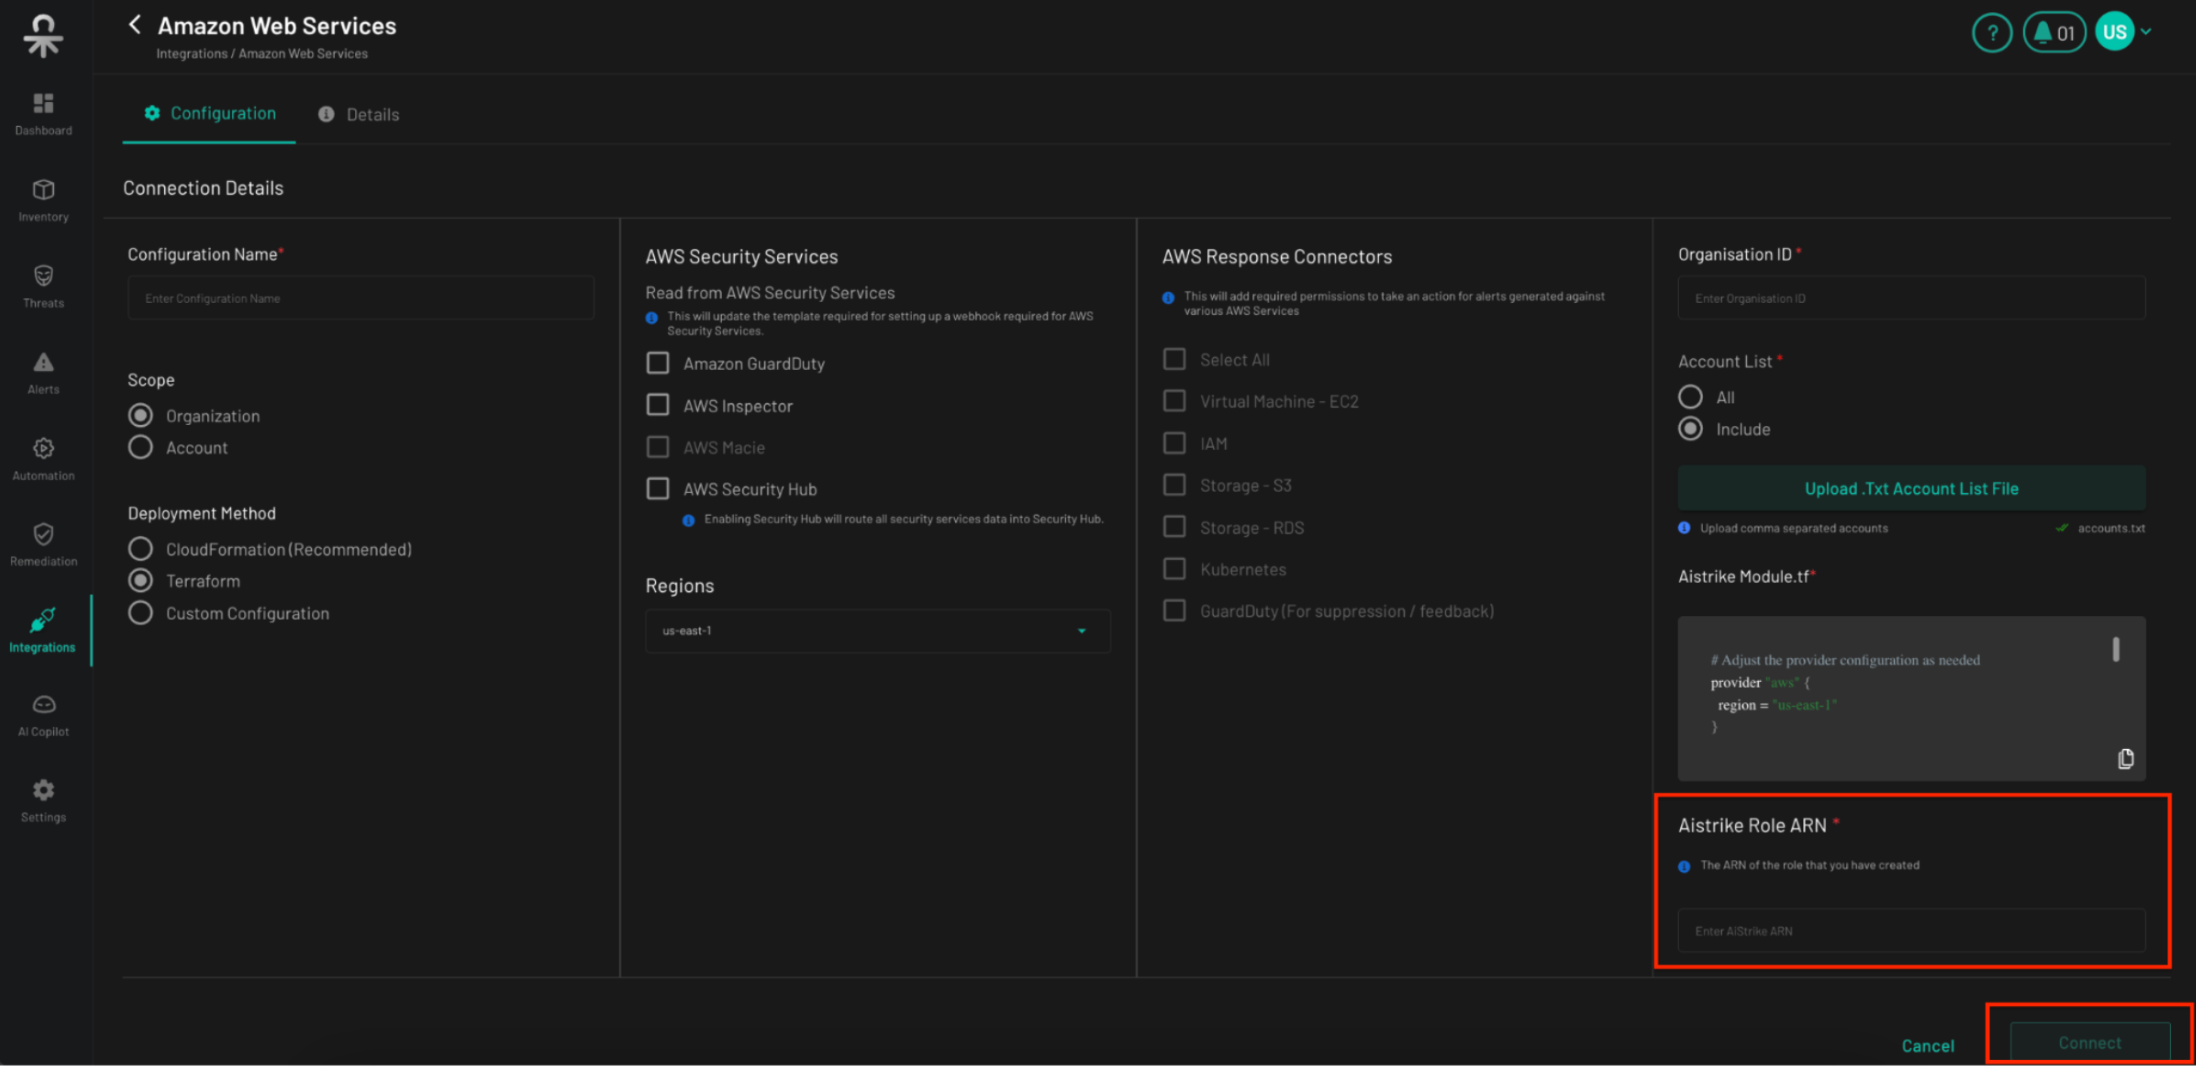
5. Paste the AiStrike Role ARN in the configuration page
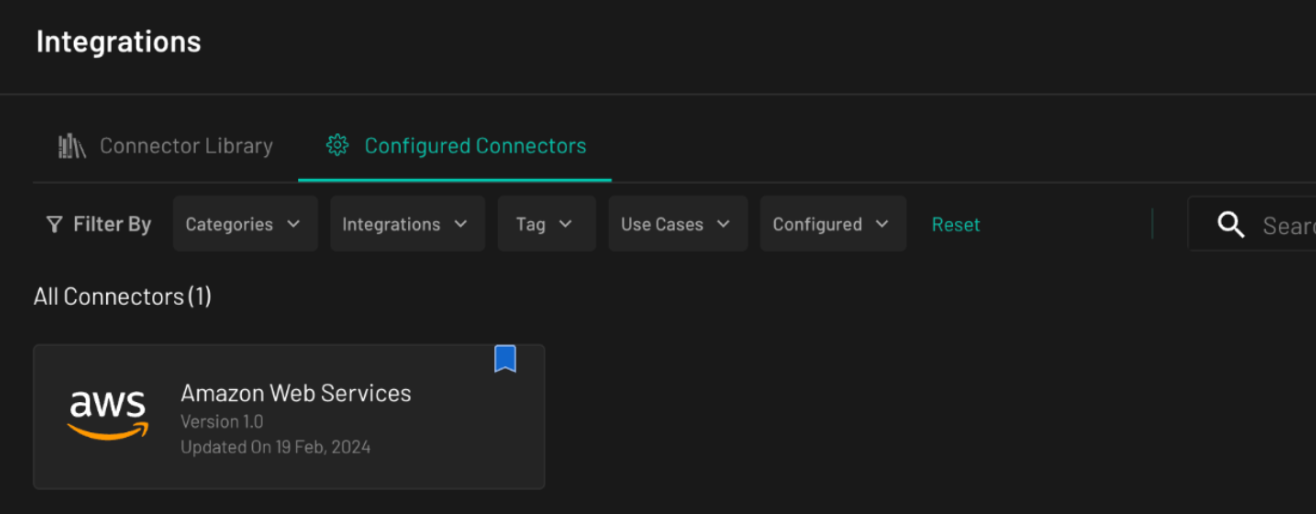
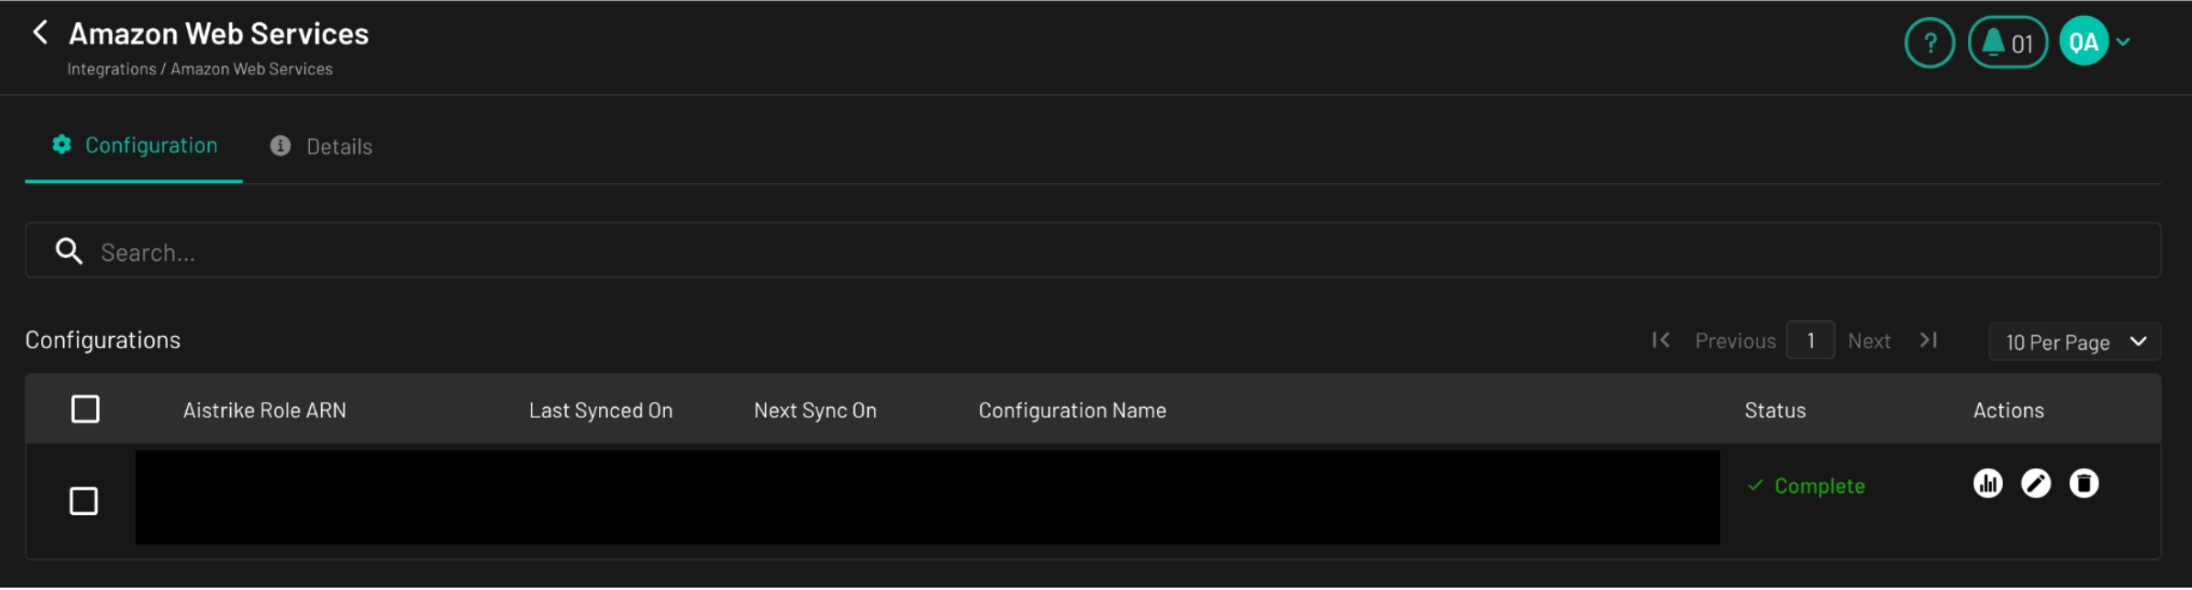
Click "Connect" to sync the accounts with AiStrike. Verify that the sync is running under configured connectors for all accounts from the UI.
6. Verification of Onboarding setup is completed
-
Navigate to the connectors page and view the status.
-
This will show the current status of connector sync.
-
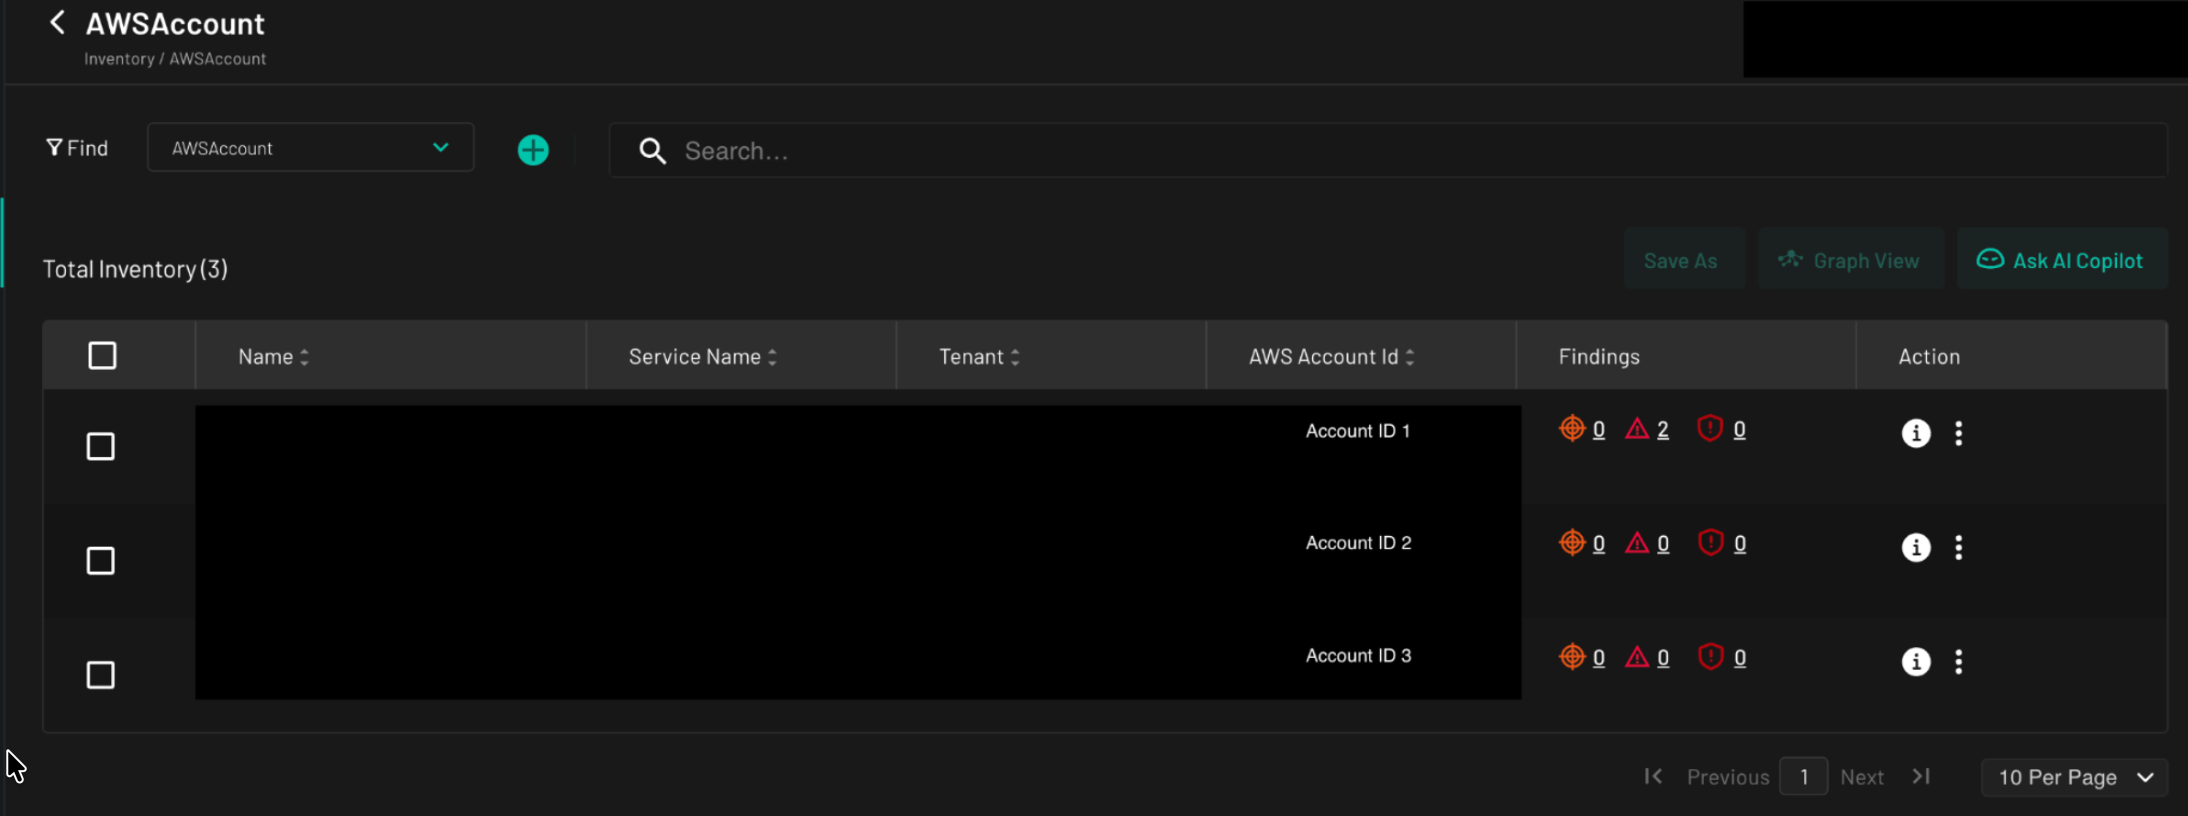
Navigate to the Inventory page from the left side panel and click on Accounts, then click on the resource count — you should be able to view the total accounts collected by the AiStrike system.
AWS Organization Auto-Onboarding
This is an enhancement to the AWS account onboarding process. It introduces automatic onboarding of newly created AWS accounts within an organization.
Prerequisites
This enhancement only applies if:
-
The customer has onboarded AWS accounts using organization-level integration.
-
The customer has not used the "Include accounts via TXT upload" method.
What the Enhancement Does
-
Enables auto-deployment by updating the stackset configuration from "Deactivated" to "Activated" in the AWS account.
-
Backfills onboarding by creating stacksets for accounts created after initial org onboarding but before this enhancement was applied.
How to Enable Auto-Onboarding
1. Prepare Execution Environment
-
Use the AWS management account (the org root account).
-
Ensure that the executing user has AdministratorAccess or equivalent permissions to manage CloudFormation stacksets.
2. Download the script: update_stacksets_auto_deployment.sh
3. Run the Script
chmod +x update_stacksets_auto_deployment.sh
./update_stacksets_auto_deployment.sh
4. Post-Execution Verification
-
Go to AWS console > CloudFormation > StackSets
-
Search for:
AIStrikeInfraAccessRoleOrgStackSet -
Open the stackset → go to the operations tab
-
Click the latest operation ID
-
Ensure all stack Instances show status: SUCCEEDED
-
Repeat the same process for
AIStrikeInfraSecurityAuditOrgStackSet
When Will New Accounts Appear in AiStrike App?
After the script is applied and a new AWS account is created:
-
Wait for the next scheduled sync (visible under "Next Sync On" in your connector).
-
The account will automatically be onboarded into AiStrike, and data collection will begin.
Known Limitations
|
Condition |
Auto-Onboarding Status |
|---|---|
|
Org onboarding used |
✅ Supported |
|
Include accounts via TXT upload |
❌ Not Supported |
|
Account-level onboarding only |
❌ Not Supported |
|
Disable onboarding of future accounts |
❌ Not Supported (Auto-onboarding will onboard all new accounts once enabled) |
Troubleshooting steps
For the first-time configuration with correct access configured, you should not face any issues provided you have the required permissions to create and update resources in the account you are onboarding.
If you still face an issue, please check below and find a relevant topic to resolve it.
Terraform Execution Issues and Resolutions
1. Unable to Execute Terraform File
-
Cause: The file extension is incorrect or has an additional extension.
-
Resolution: Ensure the file extension is correctly saved and does not have multiple extensions.
-
✅ Correct:
File.tf -
❌ Incorrect:
File.txt.tf,File.py.tf
-
Terraform initialized in an empty directory! The directory has no Terraform configuration files. You may begin working with Terraform immediately by creating Terraform configuration files.
2. Unable to Create Resource
-
Cause: Insufficient permissions.
-
Resolution: Verify that your user or profile has the correct permissions to create the resource. Refer to the error message for specific access issues.
-
Validate your session using
aws sts get-caller-identity:
-
{
    "UserId": "AIDAEXAMPLEID",
    "Account": "123456789012",
    "Arn": "arn:aws:iam::123456789012:user/YourUserName"
}
-
Connect with your AWS Administrator to ensure you have correct credentials & permissions.
3. Duplicate Resource
-
Cause: Multiple Terraform runs on the same account without cleaning up the previous state.
-
Resolution: Clean up previously created resources using the same directory where the initial commands were run:
terraform destroy
Ensure you run terraform destroy from the same folder used previously for terraform init and terraform apply.
Example of duplicate resource:
Error: Account (123456789102), Region (us-east-1), FAILED: ResourceLogicalId:EventsConnection, ResourceType:AWS::Events::Connection, ResourceStatusReason:AIStrikeWebhookEventsConnection already exists in stack arn:aws:cloudformation:us-east-1:123456789102:stack/StackSet-AIStrikeInfraAccessStackSet-56bd646c-8820-4020-ba80-c1f32d3a096e/89623c50-e2d6-11ef-ac5d-0e5b80ad4147.